Nebari Creation Techniques for Young Deciduous Bonsai Material
In the world of bonsai, few elements are as visually grounding—and aesthetically powerful—as nebari, the surface roots that spread horizontally at the base of the trunk. Especially in deciduous bonsai, where winter silhouettes expose every structural detail, strong nebari can make or break the visual harmony of a tree.
But great nebari doesn’t always come naturally. Fortunately, there are techniques that can help you develop it. In this post, we’ll explore techniques that are effective in building nebari on young deciduous material.
What Is Nebari—and Why Does It Matter?
Nebari (根張り) is a Japanese term that translates roughly to “root spread.” It refers to the radial, surface-level roots that flare out from the trunk base, anchoring the tree both physically and visually.
A well-developed nebari:
Adds age and stability to the design
Balances visual weight from the base upward
Enhances taper by widening the trunk base
Reflects natural root spread seen in mature trees in the wild
For deciduous trees, which shed leaves and expose structure, nebari is especially critical. It becomes a central feature in winter display.

Japanese Maple at the 99th Kokufu-ten showcasing an excellent nebari
Techniques to Improve Nebari in Deciduous Bonsai
1. Radial Root Pruning from Seedling or Cutting Stage
This is the foundation for good nebari and starts early. When repotting young trees, prune away downward- or upward-growing roots and leave only the lateral roots growing radially from the base. It is especially important to prune back taproots early on young seedlings.
How to do it:
Lift the seedling or sapling during repotting season (early spring before or right at bud break).
Trim roots so only horizontal ones radiate out from the trunk.
Plant the tree flat on a shallow mound of bonsai soil or on a tile to force radial spread.
Over time, this may create a natural, wheel-spoke pattern that promotes strong, even nebari development.

The Nebari on this Japanese Maple was developed by three seedlings grown together in a pot with regular pruning of downward growing roots.
2. The Tourniquet Method
Sometimes, despite our best efforts with root pruning, a nice nebari just isn't developing
Maybe you're dealing with a seedling or cutting that developed a deep taproot, poor radial roots, or a twisted, unfixable root mass.. This brings us to the tourniquet method - A way to hit the reset button on the nebari lottery.
This technique forces roots to develop above a restriction point, creating a new nebari. Over time, this new root base can completely replace the original, giving you a second chance to build the structure you want from the ground up.
How it works:
A wire or metal washer is tightly wrapped around the trunk at the location new roots are desired.
As the tree grows, the tourniquet restricts vascular flow, forcing new roots to sprout just above it.
Eventually, you can sever the old roots and plant the tree with the new nebari as the base.
Best suited for: Trees with poor nebari or inverse taper at the base.
Caution: This is method is somewhat risky on older plants and should be reserved for young material.

Root system of Japanese maple seedling one season after applying the tourniquet method.
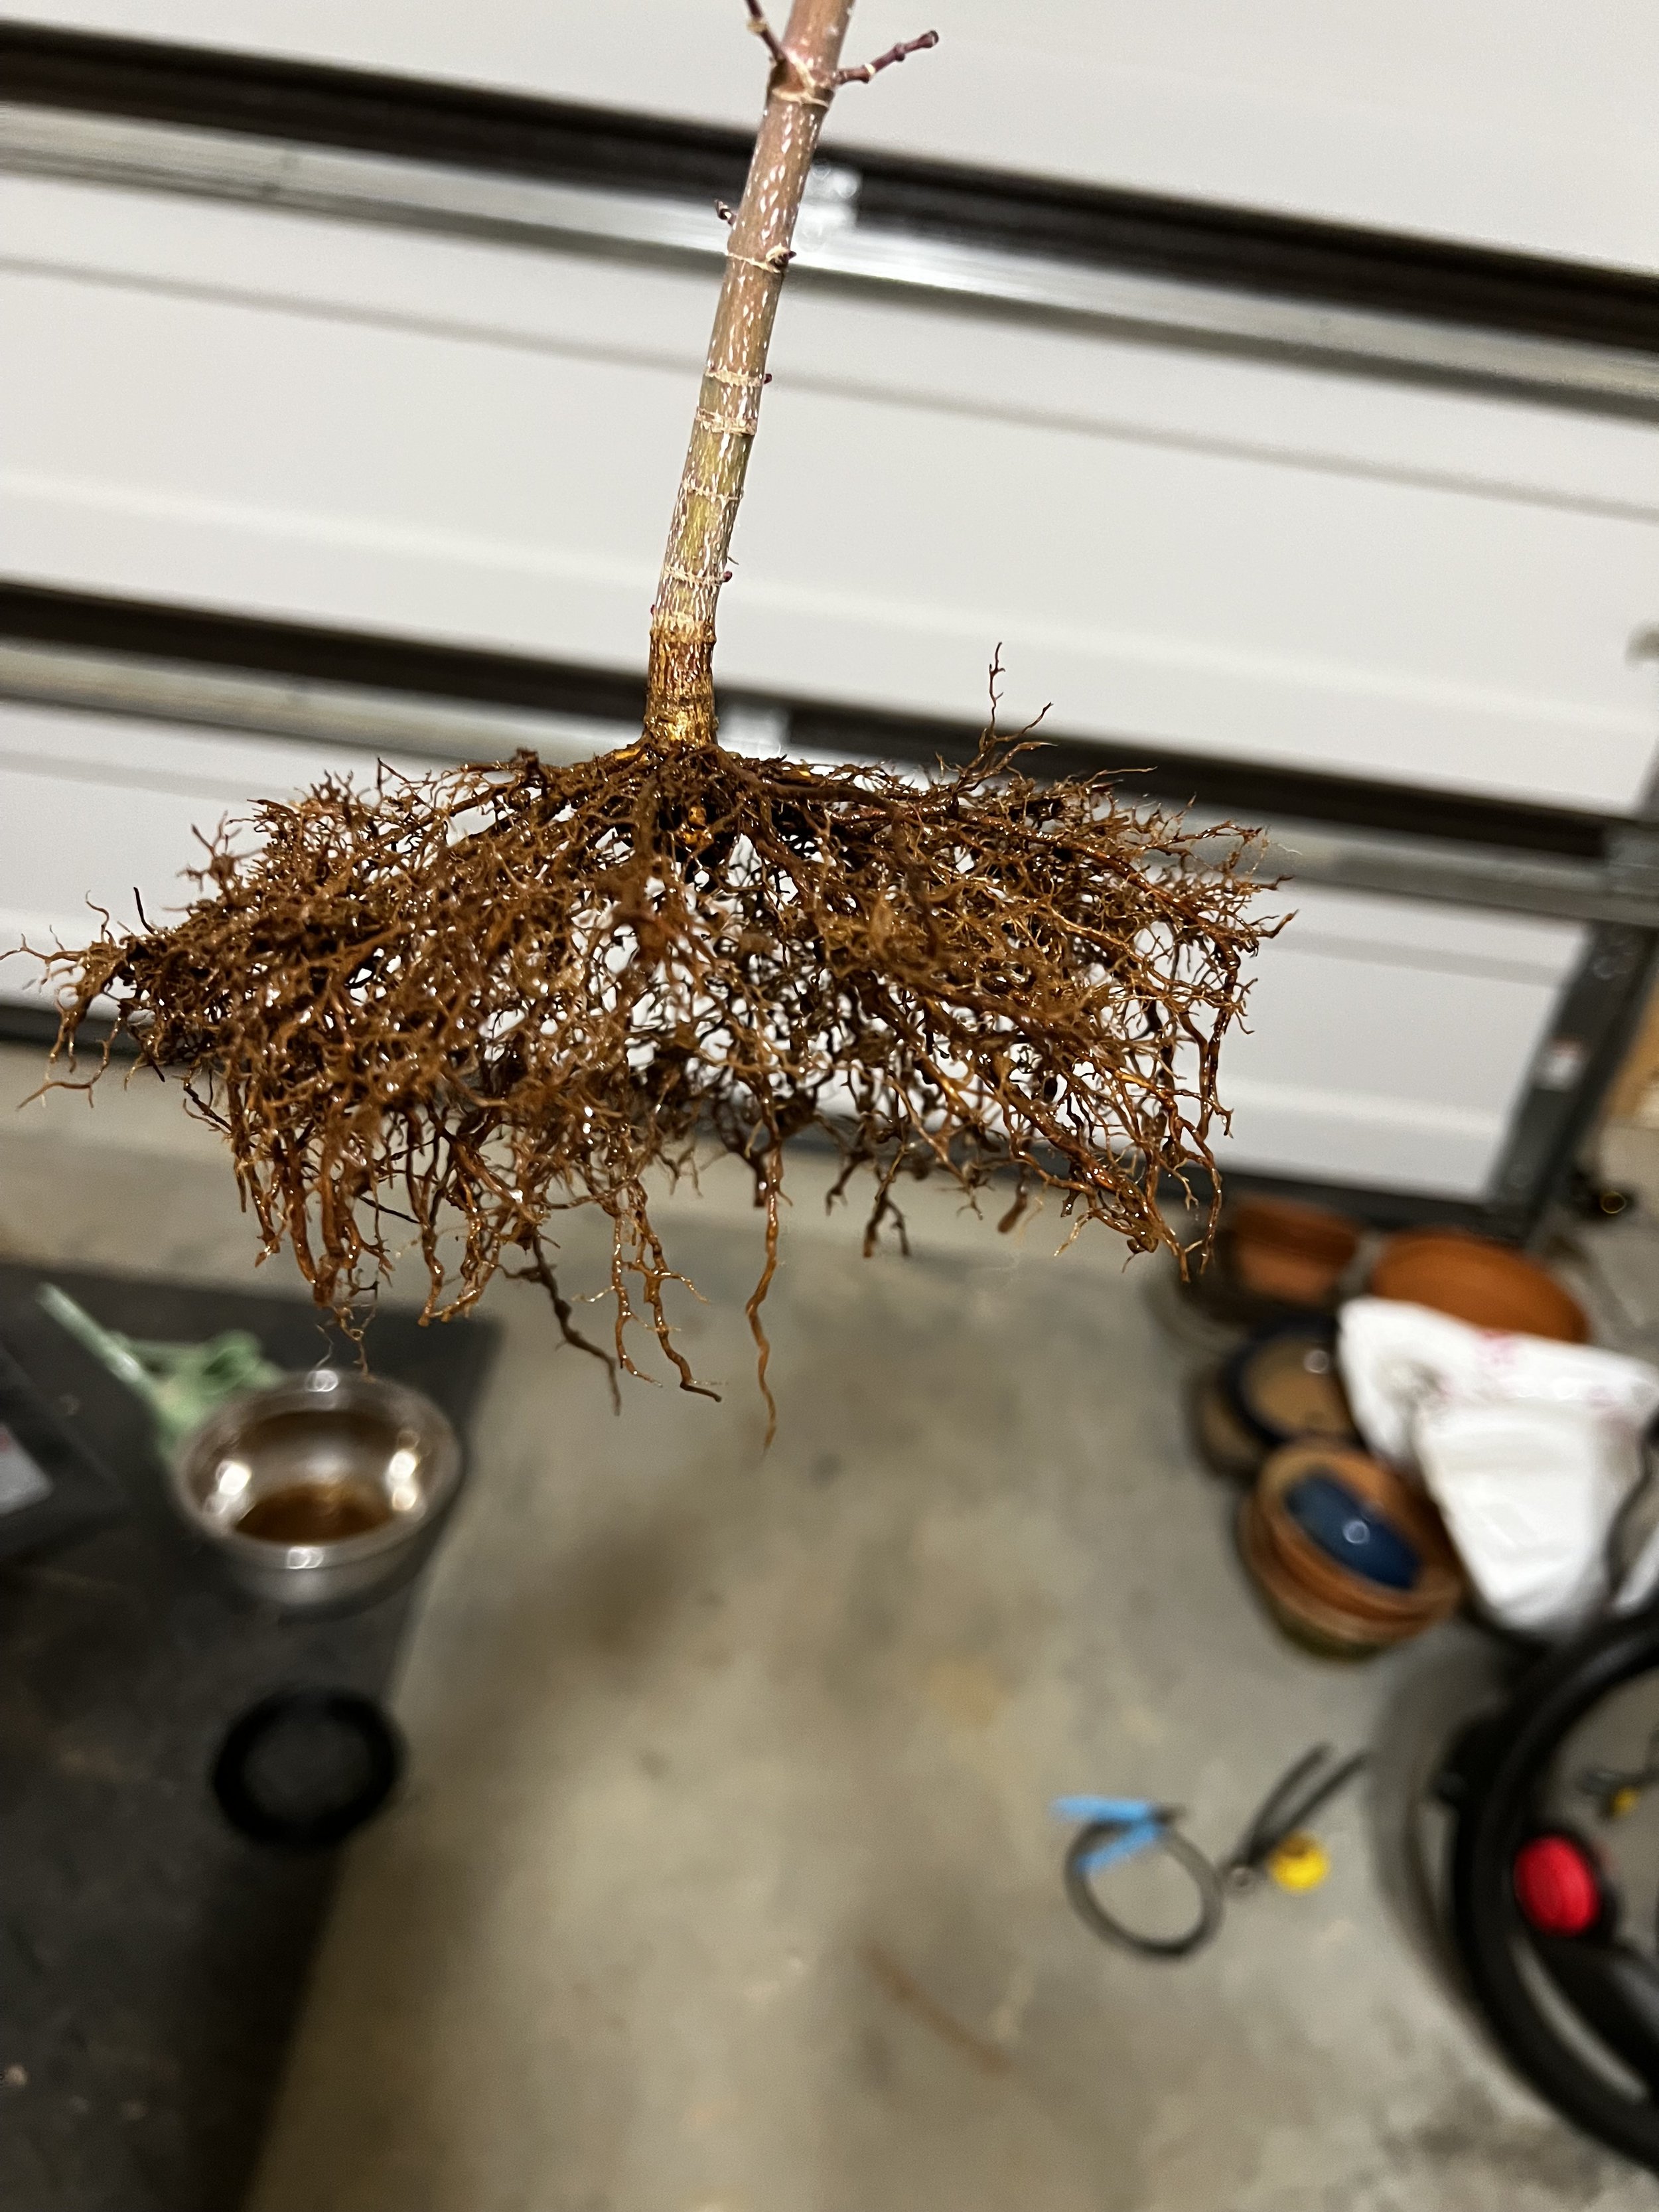
Japanese Maple seedling following removal of old root system and pruning of lateral roots.

Zelkova root system one year after applying the tourniquet method

Zelkova seedling with a poor root system. A tourniquet was applied
3. Ground Layering
Similar in concept to the tourniquet method, ground layering involves partially burying the trunk above poor nebari and encouraging new root formation.
Steps:
Remove bark around the trunk just above the old root base.
Rooting hormone may be applied but is not necessary.
Cover area with growing media.
After roots develop (can take one or two seasons), cut below the new root line and replant.
This is highly effective for correcting bad root flare or starting fresh with poor stock, but is a method reserved for slightly older plants with some trunk thickness already developed.
Keep It Consistent
The secret to nebari development in young bonsai is patience and repetition. Once you have used the above techniques to build the foundations for a nebari make sure to revisit the root system at every repotting (every 1 to 2 years):
Trim any downward roots
Keep horizontal roots
Prune back overly thick roots to lateral roots
Spread roots outward
Keep the tree planted flat
Over time, this builds a strong, natural nebari that looks like it came from the wild—without needing dramatic correction later.
Final Thoughts: Grow the Base Before You Grow the Tree
It’s tempting to focus on branches, wiring, and styling when working with young material—but none of it will matter if your tree lacks a solid base. Think of nebari as the foundation of the bonsai. Everything above it is built on its strength and structure.
Investing time in your tree’s roots now will reward you with a bonsai that looks old, grounded, and refined for decades to come.